Thursday, March 22, 2018

Creamy tuscan garlic chicken


If you are looking for a restaurant quality meal ready under 30 minutes, this should go up on your bookmark right away!!! This valentines day, my husband decided to cook a romantic dinner for us.. and he's great with the BBQ grill, but has minimal skills in the kitchen. Basically, I am trying to put forth how quick and easy this meal is! Just following these simple steps, he was able to create such an amazing meal!
We were recently gifted a panini grill press by our family. And since my husband and I were super excited to try it, we decided to grill the chicken in the grill press. The original recipe stated that the chicken be cooked in a skillet, but the grill cooked the chicken to perfection. It was juicy and beautifully cooked. So that is another preference that you can choose from.
Creamy Tuscan Garlic Chicken had the most amazing garlic sauce with spinach and sun-dried tomatoes. It was a bite-full of goodness one bit after the other. I paired this salad with a beautiful spring salad, with arugula, apples and pecan. I will link the recipe to the salad below as well. But if you like, you could serve this chicken over pasta and enjoy it too! Hoping that you guys give this amazing recipe an attempt! Make it a romantic meal for two like we did, or enjoy it as a family night meal. Either way, your palate will thank you for it.

Prep time: 10 mins Cook time: 20 mins

Ingredients:

  • 1.5 pounds boneless skinless chicken breasts
  • PAM Olive oil spray
  • 1/2 cup heavy cream
  • 1/2 cup milk
  • 1 tsp garlic salt
  • 1 tsp Italian seasoning (or my go to Mrs Dash seasoning)
  • 1/4 cup parmesan cheese
  • 1 cup spinach chopped
  • 1/2 cup sun-dried tomatoes
Directions:
  1. Sprinkle the chicken breast with salt and pepper on each side and let it sit for about 5 mins. In the mean time, heat up the panini grill press. Turn the press to the panini grill setting and heat the grill. Once heated, spray the gray with a little olive oil spray. Cook each side for about 7 mins or until brown on each side and cooked until no longer pink in center. If you are using a skillet, put 2 tbsp olive oil in the skillet and cook the same way on each side. Remove chicken and set aside on a plate. 
  2. In the same skillet, add heavy cream, milk and boil for 2 mis. Then add the garlic salt, seasoning, and parmesan cheese. Whisk over medium high heat until it starts to thicken. Add the spinach and sundried tomatoes and let it simmer until the spinach starts to wilt. Add the chicken back and cook for another 2 mins. 
Put this meal at the top of your must make list! It was one of our best home cooked romantic dinners. Pair it with a beautiful salad (link attached) or serve over pasta. If you are going to serve this over pasta and like your pasta a little saucy, double the sauce. Feel free to comment with questions or to let me know if you enjoyed this recipe. Share this lovely recipe with your loved ones.. until then,  Live,  Love,  Laugh and Eat.. Oh yes, EAT!!   


Apple & Spiced pecan salad - http://diaryofafoodiekid.blogspot.com/2018/07/apple-spiced-pecan-salad.html

Thursday, February 22, 2018

Braided Chicken bread


In case you guys haven’t noticed already, I am a big sucker for creating recipes from leftovers. This is probably because I can never portion correctly and cook for just 2 people.. I always end up either buying extra ingredients or cooking extra food. Former more often than the latter. In the case of this recipe, I had the second problem. I made extra kheema (ground meat), for a get together, and my husband refused to eat these leftovers a second time.. yep, I already fed him the leftovers once before.. but for the second time around, I knew I had to recreate this in a way that he would enjoy this meal, and I would too. So I revamped my kheema(ground meat), by mixing it with some sauces. It was originally a dry kheema(ground meat) dish. Then I stuffed this kheema(ground meat) inside a bread. Easy peasy isn't it. He devoured it, and I finally managed to finish my kheema too. Although, I used this recipe to finish off my leftover kheema(ground meat), this is also a great alternative to make with any kind of stuffing. It could even be leftover vegetables, you can use lamb, beef or turkey instead of the ground beef that I used or you could whip up some fresh stuffing and make this bread. Just one piece of advice would be, to use a filing that is slightly moist. Since you will be baking the bread with this stuffing, the stuffing might dry out if it doesn't have enough moisture. Having said that, do not make the stuffing so wet, or gravy-like, that all your stuffing runs out of the bread and makes it soggy. So without wasting much time on my wet-dry saga, here is the recipe! I follow this bread recipe to the tee - and it never disappoints. Hope you enjoy it as much as I do.

Ingredients
  • For the dough: 
    • All purpose flour - 4 cups
    • Instant yeast - 1 tbsp
    • Fresh milk - 2 tbsp (You could also use powdered milk, same quantity)
    • Salt - 1 tsp
    • Oil - 4tbsp
    • Eggs - 2 (1 for the dough and 1 for glazing later)
    • Powdered sugar - 1 tsp
  • For the chicken filling:
    • ground chicken - 1 lb
    • Onion - 1/2 cup, finely chopped
    • Tomato - 1/2 cup, diced
    • Green chillies - 3, chopped
    • All purpose flour - 1 tbsp
    • milk - 1/4 cup
    • Oil - 2 tbsp
    • Cumin powder - 2 tsp
    • Hot sauce - 1 tbsp
    • Garlic powder - 1 tbsp (you can substitute with fresh garlic
    • Ranch - 2 tbsp
    • Salt
    • Pepper
    • Cheese (optional)
Directions
  1. For the dough, mix together the flour, salt, sugar, milk, yeast, oil and egg. Knead it to a medium soft dough with slightly warm water. I used about 3/4 cups of water. But make sure you little water at a time, so you don't end up with a runny dough.
  2. Leave it covered to rise for an hour. 
  3. In that time, get your filling ready. To make my filling, I made my kheema(ground meat) previously. Recipe for that was to take some oil, roast some jeera in it, then add onions and saute. Next add chillies, tomatoes & salt and cook until soft and the mixture is like a paste. Now add the kheema and cook until you smell the aroma of cooked kheema(ground meat).
  4. For the filling for the bread, I added some oil to a pan. Once hot, I added some all purpose flour and roasted the flour. Then I added milk to it and mixed until it turned into a smooth paste. Next I added some garlic powder, cumin powder, hot sauce and ranch to it. Then I added my previously cooked kheema to this along with some salt and pepper. That was it, my filling was ready.
  5. Once my dough was risen, divide the dough into 4 parts. Preheat the oven to 400 degree F
  6. Roll out the dough into a rectangular shape about 1/3 inch thick. Slit the edges with a knife.
     
  7. Put the filling in the centre (add cheese to the top if you like) and fold each side so they overlap each other. Similar to a braid
  8. Brush the top with beaten egg and sprinkle sesame seeds to the top. Place on top of a greased baking tray. I usually cover my trays with aluminum foil before I place the bread on it
  9. Bake for 30 minutes or until lightly golden brown at the top of the bread
  10. Wait for it to cool before taking it off the tray. Your braided bread is ready to devour! 
I have made this bread and consumed it immediately. And have also, stored it and used it the day after. Either case, the bread stays soft and moist. If storing, please store in an airtight container and refrigerate. You can also make the dough and store it before hand. I have personally stored this dough for up to 3 days in the refrigerator and it has still worked out beautifully. Just make sure, you bring the dough to room temperature before rolling it out. I hope you enjoyed this recipe too! This is my basic stuffed bread recipe, and I will keep going back to it time and again.. Until then dear friends, Live, Love, Laugh and Eat.. Oh yes, EAT! 


Tuesday, February 13, 2018

Rasmalai cheese cake


Hi everyone, the first month of 2018 is finally over. It was a super busy month for me, but I won't complain. I travelled to 2 countries already this year, so on the travel front, this year seems to be taking shape beautifully. As I sit and ponder on how my January went, I feel the absolute urge to share one of my dessert recipes from last month. I had been meaning to try this fusion dessert for a while now. And since I had a lovely family get together at my place, I finally got to try it out. The get together was around the Indian Replubic day, which further probed me into giving my dinner that Indian touch. I made Green chicken biryani, bread rolls with ground beef filling,  rose rolls with ground chicken filling and the Rasmalai cheese cake. This dessert was my star performer of the night and that's why I'd love to share this recipe with all of you today.
Super quick, super simple and a great fusion recipe to marry the Indian rasmalai and the New York cheese cake.
For this recipe, I bought store bought rasmalai, but I shall hopefully share my homemade ras malai recipe with you all soon, in another post.

Ingredients:

For the crust:
  • Graham crackers, crushed 
  • Pistachios, ground 
  • Unsalted butter - 1/4 cup
  • Green food coloring (Optional) 
For the cheesecake:
  • Cream cheese, softened - 16 oz
  • Rasmalai - 12 pieces 
  • Gelatin - 1 tsp (can substitute with Agar agar)
  • Water - 1/4 cup (to disolve gelatin) 
  • 1 cup whipped cream
  • Sugar - 1/2 cup
  • a few strands of Saffron 
Directions:
  1. First, grind the pistachios to a granular powder consistency. If you want to make the mixture richer, you can mix other nuts with pistachios, but I chose to go ahead only with pistachios.
  2. Crush the graham crackers and mix the two with 1/4 cup of melted butter. Then add a few drops of green coloring to enhance the color. Press this mixture against the base of your springform pan to create the crust. Once the crust is well spread and even, refrigerate it until you make your cheesecake filling.
  3. Next, separate the rasgullas from the ras malai mixture and kept that aside to use later. 
  4. If using gelatin, sprinkle it over the water and keep aside for 5 mins. Once soaked microwave it for 30 sec until completely melted. Add it to the rasmalai milk. If you are substituting gelatin with agar agar powder, boil the agar powder with the rasmalai milk directly, instead of soaking it in water. 
  5. In a large bowl, beat the cream cheese on a low speed until it is smooth. Then add the sugar in small parts and beat until the sugar is completely incorporated in the cream cheese. You can increase or decrease the sugar as per your taste. Next add the rasmalai milk and gelatin mixture and beat until even. Add a few strands of saffron to this mixture. 
  6. Lastly, fold the whipping cream to your mixture and make sure you don't overmix or overfold the whipping cream to your cheesecake mixture. 
  7. To assemble, place the pieces of rasgullas on the crust making sure you spread them evenly. Then pour the rest of the cheesecake filling on top of the rasgullas, and keep it refrigerated over night or minimum 5 to 6 hours till set. 
  8. Once set, demould and decorate with the remaining whipped cream and pistachio crumbs or whole pistachios. I forgot to save my pistachio crumbs in the beginning so used whole pistachios instead.
  9. Serve cold 

Please let me know if you do give recipe a try. If you are a rasmalai and a cheesecake lover like me and my husband, this combination is definitely a must try! Feel free to comment if you have any questions/suggestions and share this recipe with your loved one.. until then, Live, Love, Laugh & Eat.. Oh yes, EAT! 


Tuesday, January 16, 2018

Sloppy Joes with an Asian zing


My Sloppy Joes were another star performer in those quick meals that take under 30 mins. It requires minimum to virtually no culinary skills.. Maybe that's why, they are another repeater in my kitchen.. lol.. but honestly, cook the meat, stir in the sauce - that literally comes out of a bottle (multiple bottles, but still..), throw it on slider buns.. and Voila, dinner is ready.. I usually try different variations to the sauce that I add to the meat, so it doesn't seem like the recipe is a repeater. You can also play with toppings to create different variations and again following my mantra of always using leftovers from the refrigerator. Sometimes, it makes me wonder how I have so many leftovers in my refrigerator, when most of the time I'm creating recipes from leftover ingredients.. but oh well, that's a question to be pondered upon another time. For now, I present to you Asian inspired, Sloppy Joes..

Dice your onions and bell peppers and sautée them in oil until translucent. Once done, move them to the side of the pan and add ground beef. Add salt and pepper and let it cook


While the beef is cooking, you can go ahead and make your sauce. For the sauce, I added ginger-garlic paste, soy sauce, apple cider vinegar, worcestershire sauce, brown sugar, tomato ketchup, tomato paste and hot sauce together. Add in some more chili flakes or hot sauce, if you like that extra kick. Whisk all these together so they form a smooth paste.


Make sure to keep stirring the ground meat while it's cooking. You will know its cooked, when the water has dried out and you can smell the aroma of the meat. I started out making my sloppy joes with ground beef, which is what I have mentioned in the recipe below. But over time, I have changed it up with ground chicken and ground turkey, and both versions turned out equally good! The cooking time for each of these meat would differ too.


The picture above is a reference for the color of the meat being cooked. Once your meat is cooked, stir in the sauce and mix evenly. Cook for another few minutes until the sauce has thickened. 


And your sliders are ready to assemble. You may toast or warm your buns as per your preference. 
I also top my sliders with some lettuce and cheese, but that again is a preference, you can substitute lettuce with coleslaw, or other toppings you'd like in your sliders. I used smoked cheddar in this recipe, since it went well with my other ingredients that I added to the sauce, but feel free to use any other cheese that would pair up better with your toppings. 


Prep time: 10 mins Cook time: 30 mins

Ingredients:

  • For the meat: 
    • 1 lb ground beef 
    • 1/2 onion, chopped
    • 1/2 bell pepper, chopped 
    • 1 tbsp oil
    • salt & pepper according to taste
  • For the sauce
    • 1 tsp Ginger - garlic paste
    • 1/4 cup Tomato paste
    • 1/4 cup Tomato sauce
    • 1/8 cup Brown sugar
    • 1/4 cup Apple cider vinegar
    • 1/4 cup Soy sauce
    • 2 tbsp Worcestershire sauce
    • 2 tbsp hot sauce
    • 1/2 tsp red chilli flakes
  • To assemble: 
    • 1/2 cup Lettuce
    • 1/4 cup Smoked Cheddar Cheese, grated 
    • 1 pack Dinner rolls - contains 12 individual rolls 
Directions:
  1. Heat oil in a pan. Add the diced onions and sautée. 
  2. Add the peppers and sautée further until they are both translucent. Once done, push them to the side of the pan and add in the ground meat.
  3. Add salt and pepper and mix well to break any lumps. Keep stirring while the meat is cooking. Cook until it is a light to medium brown
  4. In a separate bowl, whisk together ginger-garlic paste, brown sugar, tomato sauce, tomato paste, soy sauce, cider vinegar, worcestershire sauce, hot sauce and chilli flakes.
  5. Mix in this sauce to the meat, once its turned a medium brown.
  6. Bring the mixture to a simmer, and cook until the sauce has thickened.
  7. Toast the slider buns/dinner rolls and scoop a spoonful of meat on the slider
  8. Add the lettuce and grated cheese. 


Yummilicious Sloppy Joes are ready to be served! Enjoy this delectable yet simple recipe! This is a great recipe for quick dinners or as an appetizer for parties and gatherings. It's easy to make in small batches and big. It can be stored easily, so is a great option for a make ahead meal as well.
Feel free to share and comment this recipe with your loved ones as well.. If you gave this recipe a go, or have questions, feel free to post a comment below! Until then, Live, Love, Laugh and EAT. Oh yes, EAT! :)

Wednesday, January 10, 2018

Deconstructed Jalapeño poppers!


Jalapeño poppers are a super favorite of mine.. The best ones I've had are from Jack in the box, which a popular West Coast fast-food chain. So I decided to give it a twist of my own by using some leftovers I had at home. I usually try to use up a lot of leftover ingredients at home because I get it for one recipe and have a random assortment of ingredients that need some way of bringing them together. This time around, the ingredients I was working with where jalapeños, garlic and herb flavored cream cheese and pita bread that I got with a Mediterranean salad the day before. I threw in some mozzarella cheese, ranch dressing and bread crumbs to the mixture and ended up with these deconstructed jalapeño poppers aka jalapeño and cheese pit-zza (pita-pizza). As you may have noticed, I am terrible at coming up with names for my recipe, but the end product was definitely better than my attempt at naming it. So read along...

This is a quick and easy recipe, definitely one of those weekday wonders that you can make up and serve fresh. Having fresh made dinner and using up leftover ingredients from my refrigerator, this is sure a win-win for my kitchen! I also added in tiny bits of cooked chicken on my pit-zza, but that was only to provide some meat to my ever-so-hungry-for-meat husband. This could be replaced by any other toppings you would like. Some options would be olives, bell peppers, onions, or whatever you are trying to get rid of, from your refrigerator! So without wasting more time, here goes the recipe.

Prep time: 5 mins Cook time: 10 mins


Ingredients:

  • 1 tbsp Ranch dressing
  • 2-3 oz. Garlic and Herb cream cheese (You can use regular cream cheese and season it according to your taste)
  • 1/4 cup Mozzarella cheese 
  • 1/8 cup Jalapeños, sliced (I used the Jar ones, but you could definitely used freshly cut jalapenos as well)
  • 2 tbsp Panko bread crumbs
  • 1/2 tbsp softened Butter
  • 2 Pita breads, cut in quarters (can be replaced with pizza base or any other bread of your choice)
  • Cubes of cooked chicken (optional) 
  • Salt and pepper to taste 

Directions:

  1.  Preheat the oven to 425 F.
  2.  Next spread some cream cheese on the base of your Pita breads. 
  3.  Then mix the ranch, remaining cream cheese, jalapenos, salt, pepper and chicken and kept that aside .
  4.  In another bowl, mix the softened butter and bread crumbs.
  5. Spread the ranch and cream cheese mixture on the Pita breads and sprinkle some mozzarella cheese and bread crumb mix. 
  6. Bake in the oven for about 7-10 min until the base is crispy and bread crumbs are a golden crispy brown. 

And that's it, your personal pizza is ready! I hope you enjoy this 10 min wonder like I did.. please comment below if you did enjoy this recipe and let me know how you used your leftovers. Was it Mozzarella or Cheddar? Buns or Pita breads? Either way, it will turn out delicious! Until then, Live, Love, Laugh and EAT. Oh yes, EAT! :)


Wednesday, January 3, 2018

Cream of Celery & Mushroom Soup


As the Northeast braces itself to face the Arctic "Bomb" Storm, my love for soup grows more than ever. The thought of a warm creamy soup entices me any time of the year, but even more this winter. I usually don't buy canned or packet soups from the store because they just never cut it for me. I personally don't think store bought "Cream of" soups match anywhere close to homemade soup flavors.
My last soup post was an easy yet time consuming recipe. This one however, is one of those perfect weekday cook ups. Easy and quick to make, amazing to taste.. Don't see any reason to wait to tell you more.. The initial recipe that I had referred to for this soup was a plain Cream of Celery soup. But I had leftover mushrooms that I threw into the mix, and I did not regret that one bit. But if you are not a mushroom lover, fear not, you can still devour this recipe, follow it exactly the same way without adding the mushrooms. You can basically use this recipe as the base for any other "cream of" soups. You could substitute the celery with mushrooms, asparagus, broccoli, etc.
For best results, make sure you use fresh and flavorful celery (you can tell by the color of celery, it would be a bright green color, with tightly packed stalks).


First, finely dice the onions, garlic, celery and mushrooms.


Melt butter in your pot, and add the garlic and a slit green chili. Mix in the onions and celery and cook them until the onion turns translucent. Since I have a gas stove, it takes me about 5 mins to achieve that. Once, the onions are translucent, add in the flour and stir for another 2 mins. Now add the broth.


I made fresh broth by boiling chicken, ginger-garlic paste, salt & pepper together. Once the chicken was cooked, I took out the chicken pieces and left the carcass with the leftover celery stalks and boiled that for another 10 mins. I then strained this broth and saved it for my soup.
I added the broth, some cream, and milk. If you want to make it less heavy, you could get rid of the cream and just use milk.
Stir immediately to avoid clumping. Increase the heat now and bring the mixture to a simmer. Reduce the heat to medium then add salt, pepper, and any other herbs you'd like to add. For me personally, the flavor of celery and mushroom turn out delicious together, so I don't add any additional herbs. Now cook uncovered for another 10 mins, stirring occasionally.


Your deliciously creamy soup is now ready to devour! You can enjoy this soup as is, like I did, or use it for any recipe that calls for cream of celery as a base.

Prep Time: 15 mins  Cook Time: 25 mins

Ingredients: 

  • 2 tbsp butter
  • 1 white onion, finely chopped
  • 1 packet celery sticks, finely chopped (about 6-8 sticks)
  • 1/2 cup mushrooms (about 2-3 button mushrooms)
  • 2 cloves of garlic
  • 1/2 cup all purpose flour
  • 2 cups chicken broth
  • 1 cup cream
  • 1 cup milk
  • 1 green chilli
  • Salt to taste
  • 1/2 tsp pepper
Directions: 
  1. Melt the butter in a pot. Add the garlic and chilli to the melted butter.
  2. Add onion and celery to the pot and cook until onion is translucent ~5 mins.
  3. Add the flour and cook for another 2 minutes
  4. Then add the chicken broth, cream and milk to the soup, stirring continuously
  5. Increase the heat now and bring the mixture to a simmer. Reduce the heat to medium then, and salt, pepper and any additional herbs per your preference. 
  6. Now cook uncovered for another 10 mins, stirring occasionally. 


If using as a base for another recipe, the soup will keep in the fridge for at least 3-4 days. 
This soup started off on a fridge cleanout day to get rid of my celery and mushrooms, but ended up being a real show stopper for me! I hope you enjoyed this recipe. Please feel free to share and comment. And let me know if you tried it. Until then, stay warm everyone.. Live, Love, Laugh and EAT. Oh yes, EAT! :)


Tuesday, January 2, 2018

Pecan Pie Swiss Roll


I had been meaning to finish this post up in time for Christmas, because it made for such an amazing Christmas dessert. But unfortunately a few quick getaways before the year ended, strayed me from my schedule. Nevertheless, this is a dessert you and your family will enjoy year round. I made this dessert as a Christmas gift for my husband's colleagues. And from the feedback I got, I think it was well received. Here's my rendition of the Pecan pie, translated into a Swiss roll. Swiss/Cake rolls are a great dessert to pack and gift. It has all the flavors of the cake but doesn't need intricate decorating or careful handling like a cake or even a cupcake. I hope you love this recipe as much as I did, coz this one has already become a regular in my household. 

Prep Time: 30 mins Cook Time: 1 hour 10 mins
Ingredients:

Cake
  • 3 Eggs 
  • 1 cup Sugar
  • 3 tbsp Water, - cold
  • 1 cup all-purpose flour
  • 1 tsp baking powder
  • 1/4 tsp salt
  • 1 tsp vanilla extract
  • 1 cup pecans - chopped (This can also vary according to your preference)
  • 1/2 cup powdered sugar for dusting towel
  • A kitchen towel to wrap the cake
Filling
  • 3/4 cup Sugar
  • 1 cup Dark Corn Syrup
  • 3 Eggs
  • 1/4 cup butter, melted
  • 1 tsp vanilla extract
  • 1 1/2 cup pecans chopped 
Directions:

One key pointer before starting the cake is that any good cake roll needs a good sponge cake. If you have a preferred sponge cake recipe, go ahead with it. I am listing mine below. Also, make sure to whip the eggs well, the fluffiness of the eggs is what helps give it the flexibility to be easily rolled.

  1. Beat the eggs on high speed until a little frothy. (See picture for guidance, I whipped them for about 2 mins).Preheat the oven to 375 F. 
  2. Add the sugar gradually into the eggs, while still whipping on high. (approx 2 mins)
  3. In another bowl, mix together the remaining dry ingredients for the cake except the pecans. 
  4. Add vanilla essence and water to the eggs. 
  5. Now gently fold the dry mix into the egg mixture. Make sure to not overmix, fold the ingredients together instead of stirring. This is to ensure that we don't deflate the eggs. 
  6. Pour the batter into a greased pan lined with parchment paper. I used a 10" x 15" cookie tray. Spread it evenly to ensure uniform baking.
  7. Bake for about 13-15 mins. Halfway through the bake, you can add chopped pecan to the top and press them into the cake. This step is optional in case you want to cover the outside of the roll with pecans. 
  8. Once the cake is done, let it cool for about 5 mins. Make sure you don't let it cool for too long. Because then your cake will become too brittle to roll.
  9. After letting it cool for 5 mins, invert the cake onto a kitchen towel dusted with powdered sugar and peel off the parchment paper. 
  10. Starting with a short side, roll the cake up in the towel. And let the cake completely cool like that.
                           
  1. Once rolled, you can start working on the filling until the cake cools. 
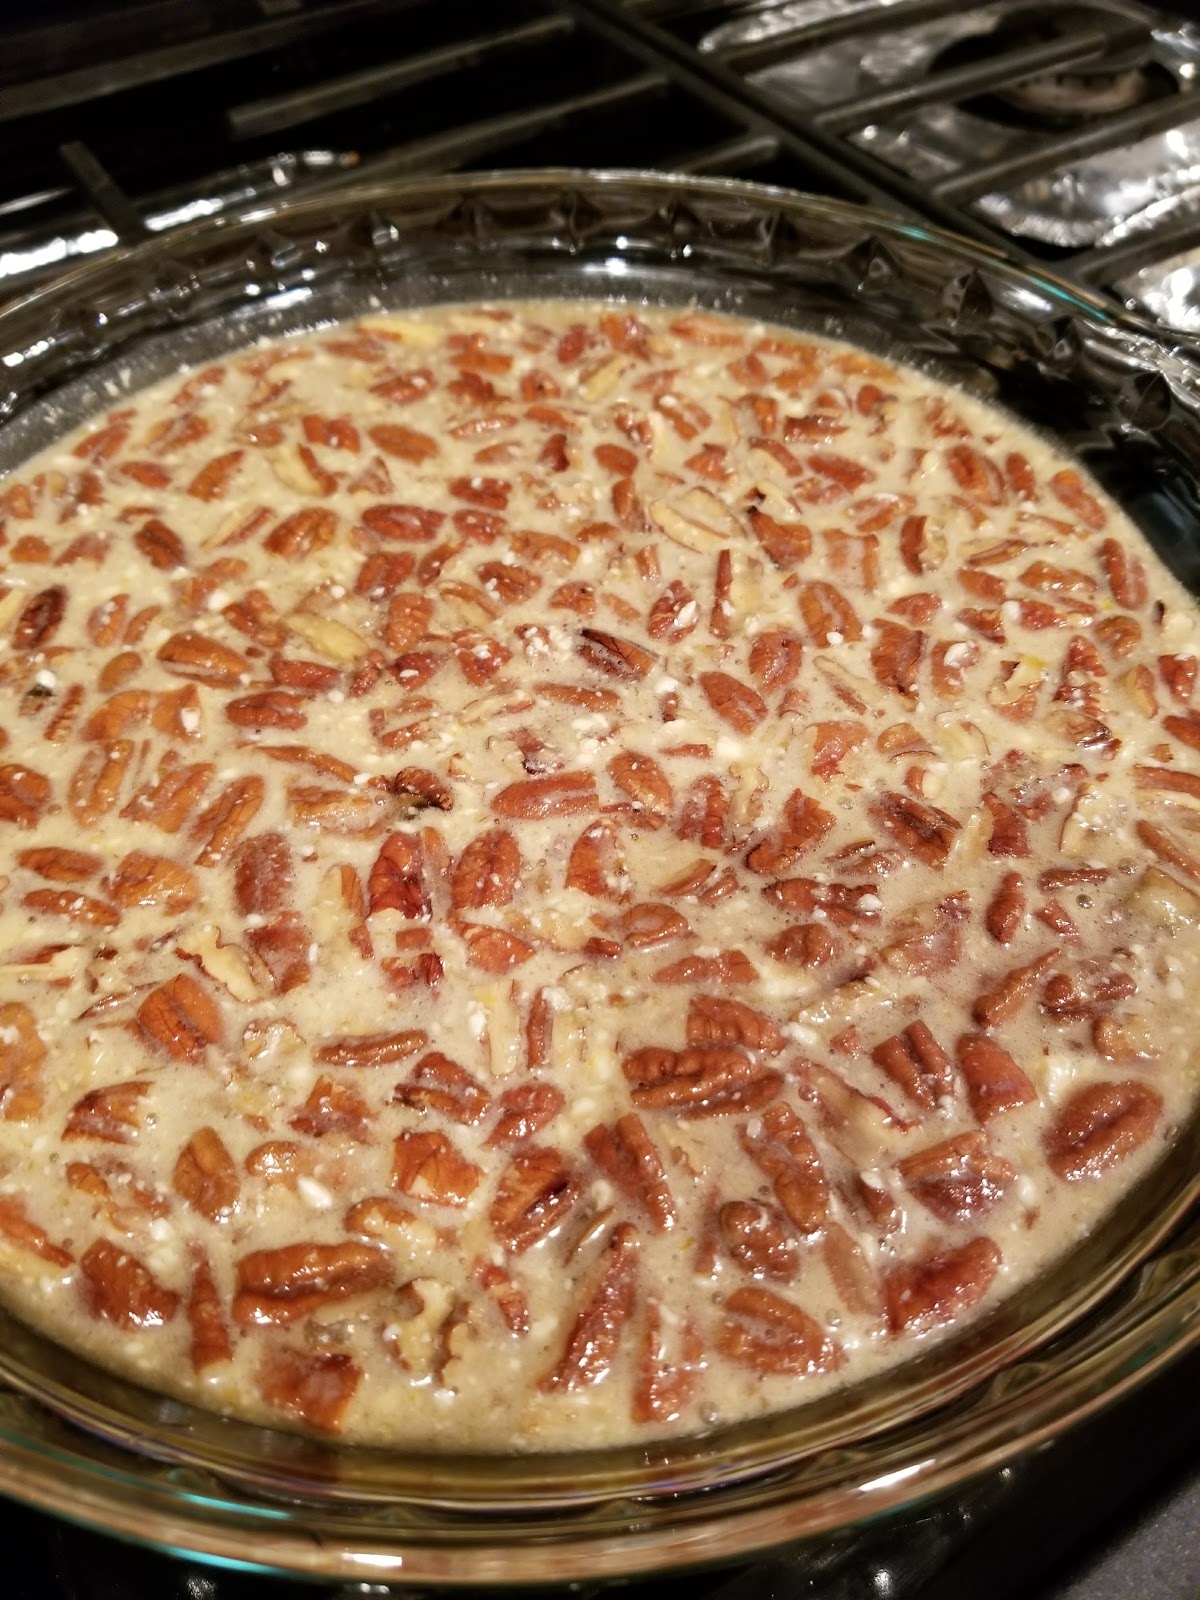
  2. For the filling, mix all the ingredients for the filling and fill it in a 9" pie dish. Preheat the oven to 350 F and bake for about 45 mins.
  3. Use a spoon to stir the filling every 10 mins. We do this so that a crust is not formed on the filling.
  4. When ready, remove filling from the oven and stir again. Let it cool for about 10 minutes.
  5. Unroll your rolled cake and spread the filling evenly over the cake. Leave about 0.5 inch from the edges. 
  6. Roll the cake back up.
  7. Refrigerate for about an hour before you devour it! 


If you are a pecan pie lover, chances are you would love this rendition of the pie as well! Please share and comment below if you have tried this recipe or have any questions about it. 


Starting the year on a sweet note with this dessert recipe. Wishing you and your loved ones a foodilicious year ahead! I hope to share my love for food through this blog! As always, Live, Love, Laugh and EAT! Oh yes, EAT!


Happy New Year loves!