Showing posts with label desserts. Show all posts

Monday, May 4, 2020

Mango Creme Brûlée

Mango Creme Brûlée

In the midst of everything that has been going around in the world, my focus lately has been to concentrate on the positives around me. Celebrate every little win, or small milestones in our life. 
My daughter turned 6 months old last week, and I wanted to make something sweet to make this occasion. 
With Ramadan going on, and keeping our socializing to a minimum, we couldn't share this occasion with many of our close family and friends, but I still wanted it to be a little celebratory. Hence, came the idea for Mango Creme Brûlée. We had a half birthday dessert, and also gave her a little taste of it. And by the looks of it, she seems to like Mango too, much like her parents. 

Makes 6 servings (ramekins) 

Ingredients:

  • 1 1/2 cup heavy cream 
  • 1/2 cup evaporated milk (can be substituted with regular milk, or half and half)
  • 1 tsp vanilla extract 
  • 1/4 tsp salt
  • 5 egg yolks
  • 1/2 cup mango pulp ( I usually buy the canned alphonso mango pulp)
  • 1/3 cup sugar, some more for topping

Directions:

  1. Preheat Oven to 325 degree Fahrenheit 
  2. Mix the egg yolks and sugar and keep aside. I used 1/3 cup sugar only, since my mango pulp was sweetened as well. If making Vanilla creme brûlée, increase the sugar quantity to 1/2 cup
  3. In a heavy bottom pan, heat the cream, milk and salt on medium heat. As soon as it begins to simmer, take it off the heat and mix in the vanilla extract
  4. Now add 1/2 cup of the cream to the egg mixture. Ensure to whisk the egg yolks in a slow and steady stream, to avoid scrambling of the eggs
  5. Now pour the remaining cream mixture into the egg yolk mixture, still stirring slowly but continuously to avoid scrambling
  6. Place the ramekins in a large baking pan. Divide the custard mixture evenly, filling to the top
  7.  Carefully fill the pan with enough hot water to reach half-way through the ramekins
  8. Bake until the edges are set and centers are a little shaky. The time usually depends on the depth of the ramekins. For my 1-inch ramekins, it takes about 30 minutes. But since I decided to use 1 large glass dish, I baked the custard for 40 mins.
  9. Remove once done, and cool it for about an hour before refrigerating. 
  10.  I'd suggest refrigerating for at least about 4 hours or more before starting on sugar topping
  11. Using about 1/4 tsp of sugar for a ramekin, sprinkle an even layer of sugar on the ramekin. 
  12. Broil for about 10 mins in an oven or use a kitchen torch to caramelize. 

Notes & Tips:

  • We prefer to enjoy the creme brûlée without the caramelized sugar layer, hence you can see I skipped that step in the picture. Traditional creme brûlée does have a caramelized layer, that is very easy to create. 
  • You can substitute the evaporated milk with heavy cream as well, that will just make the creme brûlée a little denser. This is just a preference on how dense you like your custard
  • I have noticed that my creme brûlée stays perfectly fresh and tasty for upto 3 days in the refrigerator. So can definitely be one of those make-ahead desserts. 
  • For the water bath, make sure the water level is low enough so that any bubbling doesn't spill into the ramekins
I hope you guys give this easy and yummy dessert a try in your kitchen as well. Also, to make the desert look a little festive, I printed and cut out a 1/2 sign on card stock and placed it on my creme brûlée along with a happy birthday sign. And decorated with sliced strawberry. 
Keep safe dear friends and until then, Live, Love, Laugh and Eat.. Oh Yes, EAT! 

Wednesday, February 13, 2019

Conversational Cheesecake hearts!

Hey guys, I'm sorry for being MIA for a couple of months, but I'm back! And with new and improved will to continue adding content to this blog.. We are a day away from Valentine's Day and wanted to share a dessert that worked out great for me in the past. These conversational cheesecake hearts 💕  Guess I'm cheesy like that ;) I made this for my husband, then-boyfriend, when we first started dating. It was our first valentines together, I decided to impress him by baking his favorite dessert in the world! Those of you who already know him, know that this New Yorker loves and craves a good cheesecake, so the pressure was totally on me!!!! I am actually taking a short cut, and linking the recipe for a regular cheesecake below, and adding the twist that I added, to modify them to be my valentines-ready cheesecake hearts.

Conversational cheesecake hearts

Conversational Cheesecake Hearts:

Ingredients and tools: 


  • Wilton Heart Shaped Silicone Molds
  • Fine Tip Paint Brush
  • Food coloring - in a couple of colors, I used red and yellow (to create, orange, pink and red cheesecake hearts)

Directions:

  1. Follow basic cheesecake recipe up until you add the batter to the tin pan for baking. (Before putting it in the water bath
  2. Before baking, divide the batter into equal parts depending on the number of colors you choose to use. In my case, I divided it into 3 parts. 
  3. Add the food coloring to the batter to create your own colored cheesecakes. I used orange (1 drop yellow + 1 drop red), pink (1 drop red), and red (2 drops pink)
  4. Pour batter into the silicone molds and add in water bath. Bake as per instructions in the Basic cheesecake recipe
  5. Let them cool before you remove them from the mold
  6. Once cool, remove from the molds and paint conversation heart phrases onto the tops of the cheesecake using food coloring. 

I wish you guys enjoyed this recipe. If you do try them, please let me know. Wishing all you sweet readers a happy and loving Valentine's Day! Until then, Live, Love, Laugh and Eat.. Oh yes, EAT! 💕 ❤️ 


Tuesday, February 13, 2018

Rasmalai cheese cake


Hi everyone, the first month of 2018 is finally over. It was a super busy month for me, but I won't complain. I travelled to 2 countries already this year, so on the travel front, this year seems to be taking shape beautifully. As I sit and ponder on how my January went, I feel the absolute urge to share one of my dessert recipes from last month. I had been meaning to try this fusion dessert for a while now. And since I had a lovely family get together at my place, I finally got to try it out. The get together was around the Indian Replubic day, which further probed me into giving my dinner that Indian touch. I made Green chicken biryani, bread rolls with ground beef filling,  rose rolls with ground chicken filling and the Rasmalai cheese cake. This dessert was my star performer of the night and that's why I'd love to share this recipe with all of you today.
Super quick, super simple and a great fusion recipe to marry the Indian rasmalai and the New York cheese cake.
For this recipe, I bought store bought rasmalai, but I shall hopefully share my homemade ras malai recipe with you all soon, in another post.

Ingredients:

For the crust:
  • Graham crackers, crushed 
  • Pistachios, ground 
  • Unsalted butter - 1/4 cup
  • Green food coloring (Optional) 
For the cheesecake:
  • Cream cheese, softened - 16 oz
  • Rasmalai - 12 pieces 
  • Gelatin - 1 tsp (can substitute with Agar agar)
  • Water - 1/4 cup (to disolve gelatin) 
  • 1 cup whipped cream
  • Sugar - 1/2 cup
  • a few strands of Saffron 
Directions:
  1. First, grind the pistachios to a granular powder consistency. If you want to make the mixture richer, you can mix other nuts with pistachios, but I chose to go ahead only with pistachios.
  2. Crush the graham crackers and mix the two with 1/4 cup of melted butter. Then add a few drops of green coloring to enhance the color. Press this mixture against the base of your springform pan to create the crust. Once the crust is well spread and even, refrigerate it until you make your cheesecake filling.
  3. Next, separate the rasgullas from the ras malai mixture and kept that aside to use later. 
  4. If using gelatin, sprinkle it over the water and keep aside for 5 mins. Once soaked microwave it for 30 sec until completely melted. Add it to the rasmalai milk. If you are substituting gelatin with agar agar powder, boil the agar powder with the rasmalai milk directly, instead of soaking it in water. 
  5. In a large bowl, beat the cream cheese on a low speed until it is smooth. Then add the sugar in small parts and beat until the sugar is completely incorporated in the cream cheese. You can increase or decrease the sugar as per your taste. Next add the rasmalai milk and gelatin mixture and beat until even. Add a few strands of saffron to this mixture. 
  6. Lastly, fold the whipping cream to your mixture and make sure you don't overmix or overfold the whipping cream to your cheesecake mixture. 
  7. To assemble, place the pieces of rasgullas on the crust making sure you spread them evenly. Then pour the rest of the cheesecake filling on top of the rasgullas, and keep it refrigerated over night or minimum 5 to 6 hours till set. 
  8. Once set, demould and decorate with the remaining whipped cream and pistachio crumbs or whole pistachios. I forgot to save my pistachio crumbs in the beginning so used whole pistachios instead.
  9. Serve cold 

Please let me know if you do give recipe a try. If you are a rasmalai and a cheesecake lover like me and my husband, this combination is definitely a must try! Feel free to comment if you have any questions/suggestions and share this recipe with your loved one.. until then, Live, Love, Laugh & Eat.. Oh yes, EAT! 


Tuesday, January 2, 2018

Pecan Pie Swiss Roll


I had been meaning to finish this post up in time for Christmas, because it made for such an amazing Christmas dessert. But unfortunately a few quick getaways before the year ended, strayed me from my schedule. Nevertheless, this is a dessert you and your family will enjoy year round. I made this dessert as a Christmas gift for my husband's colleagues. And from the feedback I got, I think it was well received. Here's my rendition of the Pecan pie, translated into a Swiss roll. Swiss/Cake rolls are a great dessert to pack and gift. It has all the flavors of the cake but doesn't need intricate decorating or careful handling like a cake or even a cupcake. I hope you love this recipe as much as I did, coz this one has already become a regular in my household. 

Prep Time: 30 mins Cook Time: 1 hour 10 mins
Ingredients:

Cake
  • 3 Eggs 
  • 1 cup Sugar
  • 3 tbsp Water, - cold
  • 1 cup all-purpose flour
  • 1 tsp baking powder
  • 1/4 tsp salt
  • 1 tsp vanilla extract
  • 1 cup pecans - chopped (This can also vary according to your preference)
  • 1/2 cup powdered sugar for dusting towel
  • A kitchen towel to wrap the cake
Filling
  • 3/4 cup Sugar
  • 1 cup Dark Corn Syrup
  • 3 Eggs
  • 1/4 cup butter, melted
  • 1 tsp vanilla extract
  • 1 1/2 cup pecans chopped 
Directions:

One key pointer before starting the cake is that any good cake roll needs a good sponge cake. If you have a preferred sponge cake recipe, go ahead with it. I am listing mine below. Also, make sure to whip the eggs well, the fluffiness of the eggs is what helps give it the flexibility to be easily rolled.

  1. Beat the eggs on high speed until a little frothy. (See picture for guidance, I whipped them for about 2 mins).Preheat the oven to 375 F. 
  2. Add the sugar gradually into the eggs, while still whipping on high. (approx 2 mins)
  3. In another bowl, mix together the remaining dry ingredients for the cake except the pecans. 
  4. Add vanilla essence and water to the eggs. 
  5. Now gently fold the dry mix into the egg mixture. Make sure to not overmix, fold the ingredients together instead of stirring. This is to ensure that we don't deflate the eggs. 
  6. Pour the batter into a greased pan lined with parchment paper. I used a 10" x 15" cookie tray. Spread it evenly to ensure uniform baking.
  7. Bake for about 13-15 mins. Halfway through the bake, you can add chopped pecan to the top and press them into the cake. This step is optional in case you want to cover the outside of the roll with pecans. 
  8. Once the cake is done, let it cool for about 5 mins. Make sure you don't let it cool for too long. Because then your cake will become too brittle to roll.
  9. After letting it cool for 5 mins, invert the cake onto a kitchen towel dusted with powdered sugar and peel off the parchment paper. 
  10. Starting with a short side, roll the cake up in the towel. And let the cake completely cool like that.
                           
  1. Once rolled, you can start working on the filling until the cake cools. 
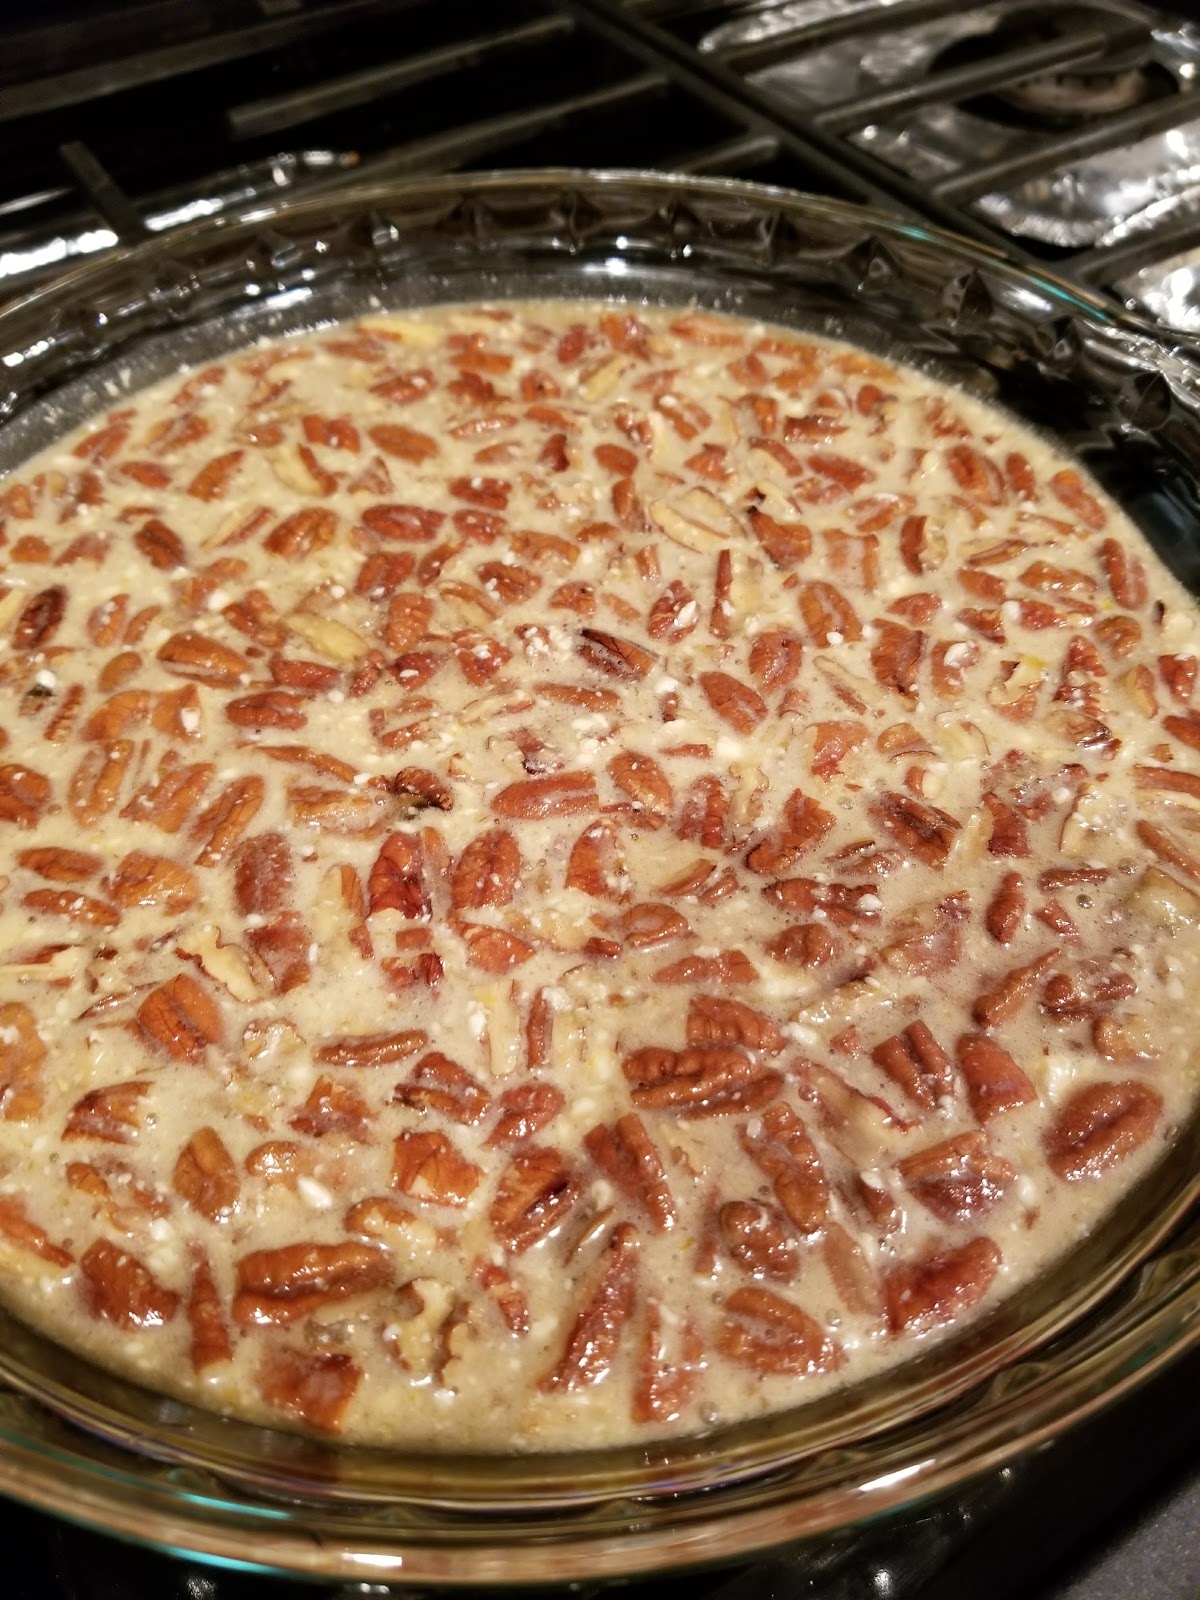
  2. For the filling, mix all the ingredients for the filling and fill it in a 9" pie dish. Preheat the oven to 350 F and bake for about 45 mins.
  3. Use a spoon to stir the filling every 10 mins. We do this so that a crust is not formed on the filling.
  4. When ready, remove filling from the oven and stir again. Let it cool for about 10 minutes.
  5. Unroll your rolled cake and spread the filling evenly over the cake. Leave about 0.5 inch from the edges. 
  6. Roll the cake back up.
  7. Refrigerate for about an hour before you devour it! 


If you are a pecan pie lover, chances are you would love this rendition of the pie as well! Please share and comment below if you have tried this recipe or have any questions about it. 


Starting the year on a sweet note with this dessert recipe. Wishing you and your loved ones a foodilicious year ahead! I hope to share my love for food through this blog! As always, Live, Love, Laugh and EAT! Oh yes, EAT!


Happy New Year loves!

Thursday, December 21, 2017

Melting Snowman Cupcakes


Tis the season to indulge and enjoy! I went to a Christmas party a few weeks back and boy was it a joy or what! The Tellier Christmas party is an event we look forward to for an entire year and it just gets bigger and better with every passing year. Although, I have joined the ritual a little late, but my husband has been attending the Tellier Xmas party for 7 years now.. and they've been hosting it for I don't even know how many years.. The Tellier Family hosts this event at their home in Jackson, New Jersey, which is a good 90-100 miles from our house. We make a trip down to Jersey, regardless.. Wouldn't miss the event of the year for anything..
This year, however, there was a winter weather advisory posted for the day of the party, and it was the first snowfall of the season, making us question our decision to drive.. now amongst, all this decision making, I had decided to take dessert to the party and had been scratching my head as to what would be a quick, easy to make and easy to transport dessert for the party.
Was debating between a Christmas Log Cake and Red Velvet Cupcakes. Of course, one would be traditional, but the other would be fun and easy to carry. So I decided to go with the latter. Luckily for us, the snow did not accumulate as much as we had expected, and most people had their snowmen melting pretty fast, and so my Melting Snowman cupcakes only seemed fitting for the occasion.

Cupcakes in general are really easy to make and super easily to decorate. For this particular party though, I made mini cupcakes since they would be great bite sized desserts with such a big crowd. Hope you enjoy this recipe and the simple decoration tips that I used to make them stand out..

Prep time: 2 hours  Cook time: 15 mins 
Servings: makes about 24 regular cupcakes or 60 mini cupcakes